Posts

User Authentication: Register & Login using JWT in NextJs & MYSQL

Image
 In the earlier tutorial, you learnt data migration to synchronize Sequelize model with MYSQL database . This tutorial teaches you authentication using JWT (JSON Web Token) with MYSQL database.  The app allows a user to simply register an account using username, email, and password. The password is encrypted using bcryptjs . A successful registration will create a new record in users table of the MYSQL database.  To log in, the app requires a user to input username and password. After successful login, the app generates a token on server using jsonwebtoken . Then the token is returned to the client and stored at the client side using js-cookie for further API access.  Run the following commands to install bcrypt, jsonwebtoken, and js-cookie: npm install bcrypt jsonwebtoken js-cookie We build login and registration forms using reactstrap components. Thus, install the following dependencies: npm install bootstrap reactstrap In this project, we use axios to access ser...

Migration using Sequelize with MYSQL database in NextJs

Sequelize is a Node based - Object Relational Mapper. It makes you easy to work with a database engine such as MYSQL, PostgreSQL, MongoDB. etc. You can create data models in NextJs and let Sequelize synchronizes them with MYSQL database.  From the models, you are able to retrieve, insert, update, and delete data in the database. To Work with MYSQL database using Sequelize, you have to install the following dependencies: sequelize, sequelize-cli, and mysql2. From the project folder (nestjs-app), execute the following command: npm install sequelize sequelize-cli mysql2 sequelize helps us synchronize  models with Mysql database.  sequelize-cli  is the Sequelize Command Line Interface helps us create models, migrations, and database. mysql2   is a fast mysql driver to work with mysql database from NestJs. In the project folder, create and change to db folder. From the db folder, run the following command to initialize sequelize: npx sequelize-cli init The command c...

NextJs - Sidebar

Image
 In the previous tutorial , you learnt to create and run  nextjs-app app. In this tutorial, you will be able to add sidebar menu to the app, use bootstrap to style the app., and use icons from react-icons library. In real project, sidebar menu is an important component. You see most of the websites have sidebar menu. It allows visitors to navigate easily in the applications. Before adding sidebar menu to the app, you have to add bootstrap and react-icons libraries to the app by executing the command below from nextjs-app folder (root folder of the app created in the previous tutorial). npm install bootstrap react-icons In the nextjs-app folder, create components folder. In the components folder, create sidebar folder. In the sidebar folder, create three files: SideBar.js, SideBarData.js, and SubMenu.js, SideBar.js import React, {useState } from "react" ; import Link from 'next/link' ; import {FaBars} from "react-icons/fa" ; import {AiOutlineClose} from ...

NextJs - create app

Image
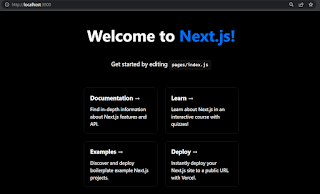
 This tutorial assumes you have installed NPM on your local machine. If you don't have it, i recommend visit  NextJs  to download and install NPM and other necessary tools. Now create NextJs app by running the below command: D:\>npx create-next-app nextjs-app You will be asked to install create-next-app package if you haven't installed it. After nextj-app application was created, from VSC editor open D:\nextjs-app folder. On the top menu, select Terminal, then New Terminal to open command window. In the Terminal command window, run the following command to start the nextjs-app development server on port 3000: npm run dev By visiting http://localhost:3000/ on your browser, you should see a page like this. Now, in pages folder, open index.js file to modify the starting page. import Head from 'next/head' import styles from '../styles/Home.module.css' export default function Home() { return ( < div className = {styles.container} > ...